I have been banging my head for hours with an issue where I have been unable to generate a certificate for a Proxmox server online. The final reason for the failure just took my by surprise.
TL;DR; The Let’s Encrypt service was down, it wasn’t my fault. Check status here: https://letsencrypt.status.io/
Background
For background, with a Proxmox server you can setup an ACME account, and a Challenge plugin:
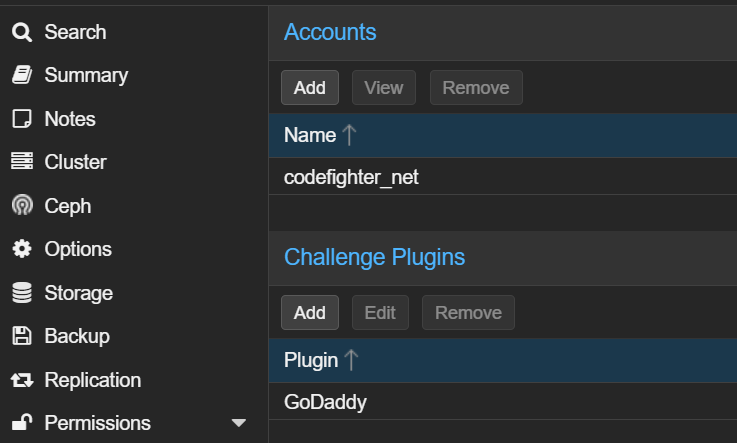
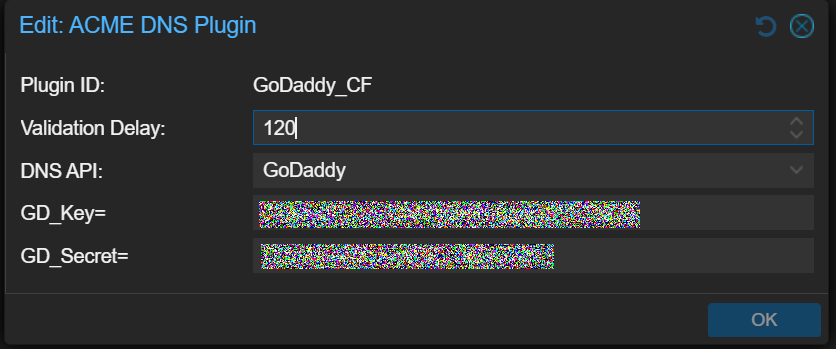
The account is simple enough to make, you just give it a name, enter your email address, and agree to Terms of Service, and that’s done. The GoDaddy challenge represents a GoDaddy DNS challenge plugin that I have already setup:
Then, within the Proxmox host, you should be able to order a certificate:
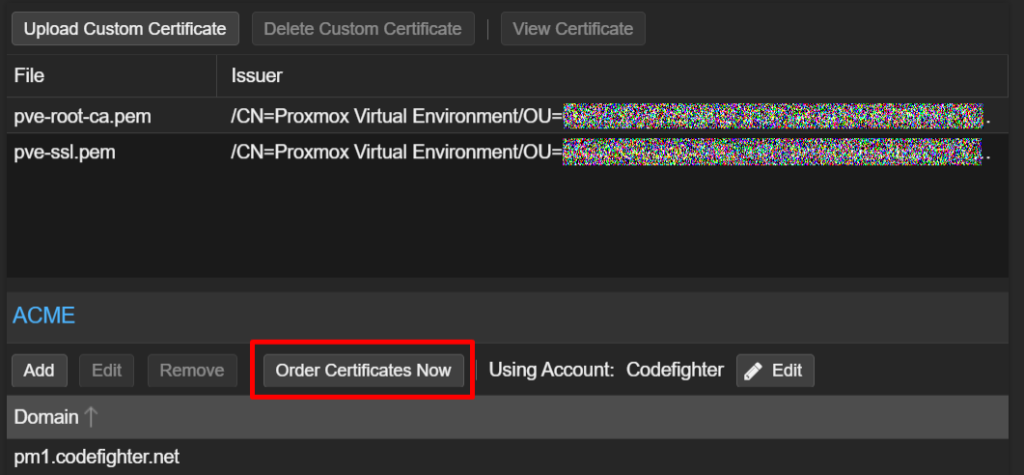
The problem is, that the request kept failing with the following:
Loading ACME account details
Placing ACME order
Order URL: https://acme-v02.api.letsencrypt.org/acme/order/0000000000/000000000000
Getting authorization details from ‘https://acme-v02.api.letsencrypt.org/acme/authz/0000000000/000000000000’
The validation for pm1.acme.net is pending!
[Mon Jul 21 19:41:33 EDT 2025] Adding record
[Mon Jul 21 19:41:44 EDT 2025] Added TXT record ‘azazazazaz-azazazaza-zazazazazazazazazazazaza’ for ‘_acme-challenge.pm1.acme.net’.
Add TXT record: _acme-challenge.pm1.acme.net
Sleeping 120 seconds to wait for TXT record propagation
Triggering validation
Sleeping for 5 seconds
Remove TXT record: _acme-challenge.pm1.acme.net
TASK ERROR: validating challenge ‘https://acme-v02.api.letsencrypt.org/acme/authz/0000000000/000000000000’ failed – status: invalid
I finally decided to check the url that was reported:
https://acme-v02.api.letsencrypt.org/acme/authz/0000000000/000000000000
Once there, I saw json similar to the following:
{
  "identifier": {
    "type": "dns",
    "value": "pm1.acme.net"
  },
  "status": "invalid",
  "expires": "2025-07-28T23:41:30Z",
  "challenges": [
    {
      "type": "dns-01",
      "url": "https://acme-v02.api.letsencrypt.org/acme/chall/0000000000/000000000000/gJaD_Q",
      "status": "invalid",
      "validated": "2025-07-21T23:43:44Z",
      "error": {
        "type": "urn:ietf:params:acme:error:serverInternal",
        "detail": "During secondary validation: Secondary validation RPC failed",
        "status": 500
      },
      "token": "azazazazazazazazazazazazazazazazazazazazazaz",
      "validationRecord": [
        {
          "hostname": "pm1.acme.net",
          "addressUsed": ""
        }
      ]
    }
  ]
}
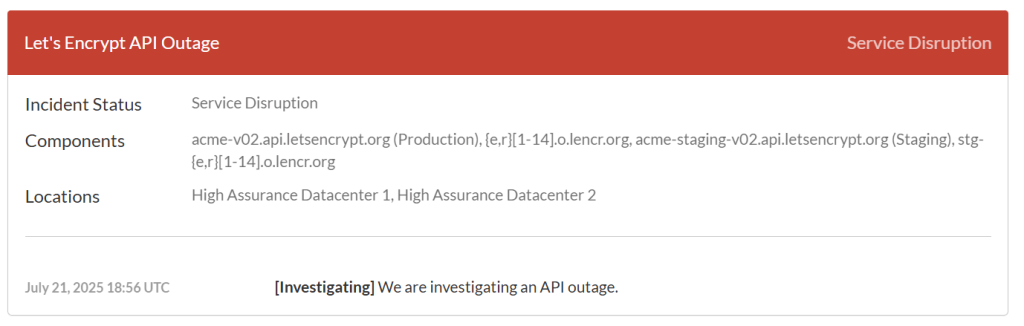
And what sticks out here, is the status “500” in the “error” tag. This looks like a 50x server error. Sure enough, I went to check the status of the Let’s Encrypt services here:
And there, I see that Let’s Encrypt is experiencing problems: